Showing posts with label Drying Produce. Show all posts

Friday, September 27, 2013

Apples, apples, and even more apples!

The tree is loaded - it doesn't even look like I've picked any - but believe me, I have!

The dehydrator is full of apple slices (and diced apples and apple rings)

I have lots of apple juice waiting to be made into jelly!

I have dozens of jars full of dried apples!

I've also been baking with them - check out these great apple fritters I made last night.  They were a big hit in my household.  I'll post my recipe below - if you aren't gluten and dairy free like my family just substitute regular flour and omit the xanthan gum and use regular milk. 

Gluten and Casein Free Apple Fritters

2 large (or 3 medium or 4 small) tart apples, peeled and diced

Combine in a medium bowl:
2 cups gluten free flour mix (I used Bob’s Red Mill)
1 teaspoon xanthan gum (omit if using a flour blend that includes it)
¾ cup raw organic sugar (use white sugar if you must but it won’t be as healthy)
2 ¼ teaspoons baking powder
1 teaspoon sea salt (again use regular salt but it won’t be as healthy)
2 teaspoons ground cinnamon

Combine in a small bowl:
2 large eggs,  beaten
¾ cup vanilla almond milk (or use the milk or milk substitute of your choice)
2 teaspoons vanilla
2 tablespoons coconut oil melted if solid (or use the melted butter substitute of your choice)

Add the wet ingredients to the dry ingredients and mix until just combined – do not over mix!

Gently fold in the apples – you want tons of apples to poke out – if they don’t poke out – add more apples. 

Drop a teaspoon full into hot oil (I use a fryer but you could also heat a couple of inches of oil in a cast iron or heavy duty frying pan).  Turn it over when it browns on one side.   Drain on paper towels – cut the first one open and make sure it cooked all the way through – if you still have batter in the middle, make the rest smaller – if it is cooked through, then you are good to finish the batch with that size. 

I think these are perfect as is – but you can dust with powdered sugar when warm or pour a light glaze over them. 


Sunday, September 08, 2013

Homemade Granola Take Two

The first batch of granola is already gone.  My teenager ate the last of it up today.  It was so good that I made another batch right away. 

I didn't mess with the recipe though - it was perfect.  The only thing I changed was I used a mixture of dried fruit instead of just plums.  I used dried raspberries, strawberries and plums. 

The recipe is here if you don't want to go looking for it.

Friday, August 16, 2013

Dried Raspberries

I've never dried raspberries before - always had plenty of other ways to use them up.  This year, however, I'm thinking about making some homemade granola and granola bars and I thought they might be really tasty with dried berries. 

Raspberries are super easy to dry - just place them in the dehydrator and turn it on.  Easy Peasy. 

I think I'll dry some strawberries and blueberries also - although I don't grow either of them so I'll have to buy some. 

If I ever make the granola, I'll post the recipe.  I'm also thinking about making some instant oatmeal to take with when we go camping.  I usually just cook oatmeal at home but I'm thinking some instant might be a good fit for camping. 

Thursday, September 22, 2011

Apples and Tomatoes!

Everything these days seems to revolve around Apples or Tomatoes. I do have more grapes to pick but I never seem to get around to it. My apple tree is still loaded - I haven't even begun to make a dent in the apples!

This week I have been running the dehydrator 24/7 and have many jars of dried apple slices to show for it. I never make enough of these - we all like to snack on them.

Today I am cooking down tomato sauce. It is satisfying to open a jar of tomato sauce in the winter and know where it came from.

Your turn, what is keeping you busy in your garden this fall?


Friday, August 13, 2010

Food I put up this week

Here is a load of sliced plums on my dehydrator.


Here is a close up of the same plums.


And here they are all ready to come off - see how much they have shrunk and how far apart they are now.


Canned green beans ready for the pantry.

Wednesday, August 05, 2009

Making Fruit Leathers (Fruit Roll Ups)

I made fruit leathers this past weekend. The first batch I am sure of many this year. They are really quite simple to make.

You just take fruit puree - sweeten it to your taste - add optional spices - and dry in a dehydrator or on plastic wrap lined cookie sheets in a very low oven (150 degrees at the most) until done.

I used plums as the main ingredient in these. I added a handful of raspberries, a handful of currants and 1/2 of an apple as well as some raw sugar and cinnamon.

Here they are almost dry in my dehydrator.

They are ready when you can easily pull them up from the plastic like this.

I cut them into wedges.

I stacked the wedges with wax paper between - who needs evil red 40 - these are a nice bright red without anything artificial added!

Monday, September 10, 2007

Drying Apples

I dried apples from my tree yesterday. Since I don't spray my tree at all - many of the apples have blemishes on them - may not be an apple you want to pick and eat - but you can certainly cut the blemishes off and still have lots to dry. The rest of the apple is fine.

Did you know that if you buy dried apples in the store, most of them are treated with sulphur to keep them a nice white color? Ick - I don't want to eat sulphur and I don't want my kid eating it either. Dried apples make such a tasty treat and they are so easy to do.

First I quarter, core and peel the apples and then I slice them. You can also do rings - but I can get more in my dehydrator sliced. I treat them with Fruit Fresh so they don't turn brown. If you don't want to do that - you can also use lemon juice, but that will make them tarter.

Then arrange them in the dehydrator and let them dry.

Here are the ones I did yesterday:


Here's the apples fresh and ready to go. They can touch - just don't overlap them.


And here are the dried ones - you can see how much they shrunk in size as they dried. They turned a tan color.

Sunday, September 09, 2007

Drying Herbs from the Garden

I dried the herbs I picked yesterday. Here's how it's done.


I use a dehydrator. This is the one I own - I have owned several over the years and this is a pretty good one for the money. I had a Ronco that I saw advertised on TV once and that thing didn't last at all - but that was years ago and they may be making them better now. They also have more industrial ones - but this one is fine for home use. It is made by American Harvest and is expandable to 20 trays. I use 6 trays with it.


First - wash the herbs. They may appear clean, but they have a lot of dust and dirt on them and you don't want that to end up in your food.


Next, dry them using a salad spinner - it will reduce the drying time.


One tray of oregano.


I did two trays of Basil.


One tray of Dill.


And two trays of Parsley.


Turn the dial to the herbs setting and plug in.


Here it is set up and running.


And if you think you can skip the washing step - look at how much dirt was left in the sink after I took the herbs out!!!!


And here are the dried herbs.

Monday, June 26, 2006

Drying onions


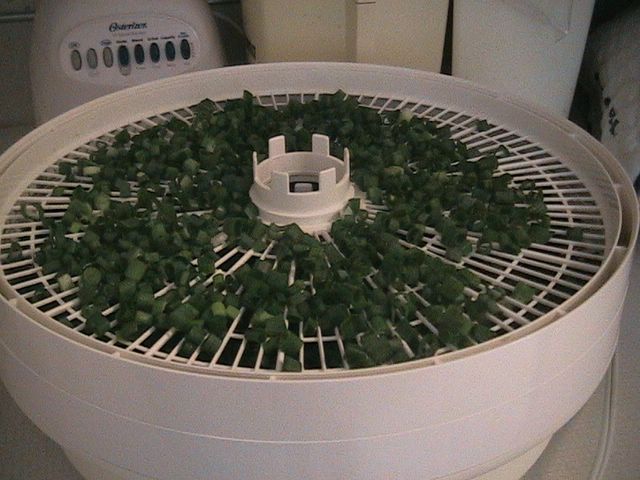
Onion tops on the dehydrator. I made shish kabobs on the grill this weekend and pulled some onions from the garden to put on the skewers. Never being one who likes to waste, I chopped up the tops and dried them for use later in the year. Posted by Picasa